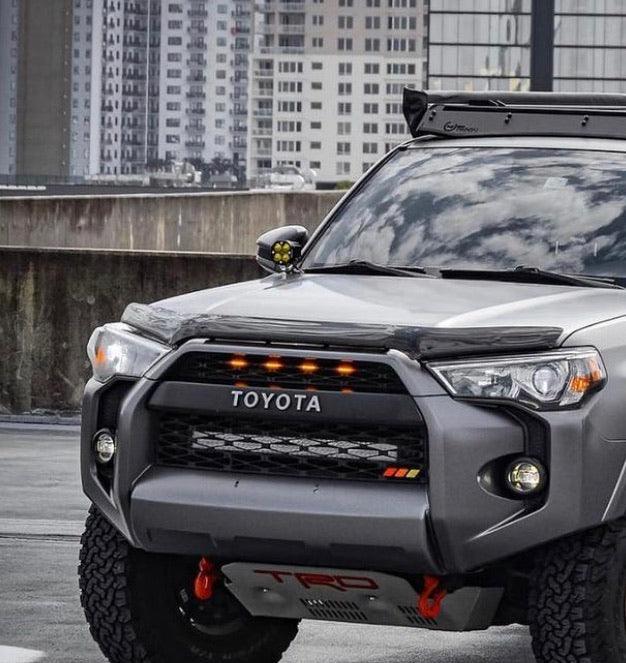
Install Guide: TRD Pro Grille on Your 5th Gen Toyota 4Runner
If you’re looking to transform the look of your Toyota 4Runner, the TRD Pro Grille is a top-tier upgrade. Its bold design instantly elevates your rig’s appearance, giving it that aggressive, off-road-ready vibe. The best part? It’s straightforward to install at home! Follow this guide to see how easy it is to add the TRD Pro Grille to your 4Runner.
Looking to buy one? Get your TRD Pro Grille today from OffRoadUSA and save with the code SAVENOW.
What You’ll Need
Before you get started, make sure you have the following tools on hand:
- Flathead screwdriver or trim removal tool
- 10mm socket wrench
- A soft cloth or blanket (to protect your bumper during installation)
Step-by-Step Installation Guide
Step 1: Remove the Factory Grille
-
Open the Hood:
Pop the hood of your 4Runner and locate the plastic clips securing the stock grille to the radiator support. -
Detach the Plastic Clips:
Use a flathead screwdriver or trim removal tool to gently pry up the clips. Be careful to avoid damaging them, as some clips will be reused. -
Unbolt the Grille:
Use a 10mm socket wrench to remove any bolts holding the grille in place. Depending on your 4Runner model, there may be two or more bolts to unscrew. -
Remove the Grille Assembly:
Gently pull the grille forward to detach it from the bumper. Place it on a soft cloth or blanket to prevent scratches.
Step 2: Prep the TRD Pro Grille
-
Inspect the New Grille:
Before installing, check the TRD Pro Grille to ensure all components are included and free of defects. -
Attach Any Badging or Inserts:
If your grille kit includes TOYOTA lettering or other inserts, now is the time to secure them in place.
Step 3: Install the TRD Pro Grille
-
Align the Grille:
Position the TRD Pro Grille over the factory mounting points. It should align perfectly with the holes and clips from the original grille. -
Secure the Bolts:
Using your 10mm socket wrench, fasten the grille into place by tightening the bolts you removed earlier. Ensure it is snug but avoid overtightening. -
Reattach the Plastic Clips:
Push the clips back into their original positions to secure the top of the grille to the radiator support.
Step 4: Final Checks
-
Check for Alignment:
Step back and ensure the grille is properly aligned with your 4Runner’s front bumper. Adjust as necessary before fully tightening. -
Close the Hood:
Lower the hood and admire your upgraded 4Runner!
Why Choose the TRD Pro Grille?
- Aggressive Styling: Transform your 4Runner with the bold, rugged look of the TRD Pro Grille.
- Durable Construction: Made from high-quality ABS plastic, this grille is designed to withstand tough conditions on and off the road.
- Simple Installation: No cutting or major modifications are required—this is a straightforward, DIY-friendly upgrade.

Get Your TRD Pro Grille Today
Ready to enhance your 4Runner’s look? Order your TRD Pro Grille from OffRoadUSA and save with the code SAVENOW.
Whether you're a seasoned off-road enthusiast or just starting your journey, this grille is a game-changer for any 4Runner owner.
