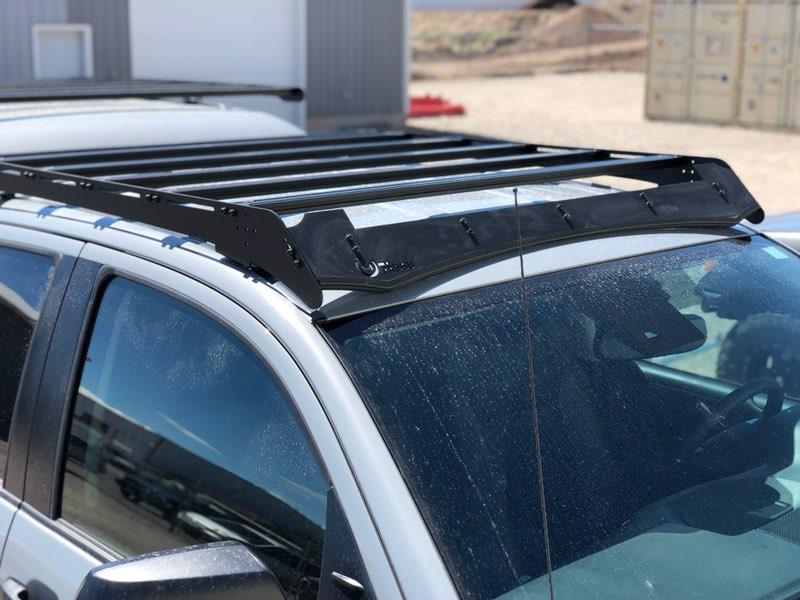
Install Guide: Prinsu Toyota Tundra CrewMax Cab Roof Rack (2007-2021)
Installing the Prinsu Toyota Tundra CrewMax Cab Roof Rack can transform your truck into an overlanding or work-ready powerhouse. This sleek, modular roof rack is designed to handle heavy-duty gear and enhance your Tundra's versatility. Below, we’ve provided a detailed, step-by-step installation guide to make this process as smooth as possible.
If you don’t have the rack yet, grab yours today from OffRoadUSA.com with this affiliate link.
Tools You’ll Need for Installation
- Socket wrench set
- Drill (with a 3/16" and 1/4" drill bit)
- Measuring tape
- Marker
- Hex key (Allen wrench)
- Silicone sealant
- Screwdriver

Step 1: Unbox and Organize Your Components
Before starting, ensure all parts listed in the kit are accounted for. Your Prinsu Roof Rack should include the following:
- 2 side rails (driver and passenger sides)
- Aluminum crossbars
- Wind deflector
- Mounting brackets
- Rubber spacers
- Stainless steel hardware (bolts, washers, nuts)
- Noise-reducing edge trim
Organizing these components will help streamline the process.
Step 2: Prepare the Roof
- Clean your Tundra’s roof thoroughly to ensure a smooth, debris-free surface.
- Locate the factory roof rack mounting points (if equipped). If your truck lacks factory points, you will need to drill new holes—don’t worry, we’ll guide you through it.
Step 3: Assemble the Prinsu Roof Rack
- Attach the aluminum crossbars to the side rails using the provided bolts and a hex key.
- Install the wind deflector on the front crossbar. Align it carefully for aesthetics and optimal aerodynamics.
- Tighten all bolts firmly, but do not overtighten.
Step 4: Mark the Mounting Locations
-
If your Tundra has factory mounting points:
- Remove the factory roof rack (if applicable).
- Align the Prinsu roof rack side rails with these mounting points.
-
If your Tundra does not have factory mounting points:
- Place the side rails on the roof to determine where the mounting brackets will go.
- Use a marker to outline the positions of the holes you’ll need to drill.
Step 5: Drill the Holes (if necessary)
- Drill into the marked positions using a 3/16" drill bit. Be sure to start with a small pilot hole.
- Switch to a 1/4" drill bit to enlarge the holes to the correct size.
Step 6: Install Rubber Spacers and Apply Silicone
- Place the rubber spacers over the drilled holes to protect your roof.
- Apply a generous bead of silicone sealant around each hole to prevent leaks.
Step 7: Secure the Side Rails
- Align the side rails with the rubber spacers and pre-drilled holes.
- Use the included bolts, washers, and nuts to secure the rails to the roof.
- Tighten everything evenly with a socket wrench to ensure the rack is firmly secured.
Step 8: Attach the Crossbars and Accessories
- Once the side rails are secured, reattach the crossbars if you removed them during alignment.
- Use the provided hardware to tighten them into place.
- Install the edge trim along the wind deflector to reduce wind noise.
Step 9: Final Checks
- Inspect all bolts and connections to ensure everything is secure.
- Double-check the silicone around the drilled holes for proper sealing.
- Test the stability of the roof rack by gently shaking it—there should be no movement.
Step 10: Customize Your Roof Rack
Now that your roof rack is installed, it’s time to customize it! The modular design allows you to mount rooftop tents, light bars, storage boxes, and more.
Why Choose the Prinsu Roof Rack?
The Prinsu Toyota Tundra CrewMax Cab Roof Rack isn’t just a functional accessory; it’s a high-quality, aerodynamic upgrade. Its low-profile design minimizes drag while the all-aluminum construction ensures durability without adding excessive weight.
Shop Now!
Ready to elevate your Tundra? Get your Prinsu Roof Rack today from OffRoadUSA.com. This rack is perfect for off-road enthusiasts, overlanders, and anyone looking to maximize their truck’s utility.
This step-by-step guide ensures your installation process is straightforward. If you have questions or need further assistance, feel free to contact the OffRoadUSA team. Enjoy your newly enhanced Tundra!
